Using Matlab With Bobble-Bot
Posted on June 30, 2019 in Matlab
This week, over on Bobble-Bot's Hackaday page, I announced the release of a Matlab interface for Bobble-Bot. I'm excited to provide this new capability to users. This post will give some more information on the integration of Matlab and Bobble-Bot. I will work through one example use case and provide links on how to get started on your own.
If you're unfamiliar, Matlab and its sister software package, Simulink, are engineering applications that combine textual and graphical programming to facilitate model based design. Both packages are commonly used in engineering curriculum around the globe. Together they provide a huge ecosystem of supporting software packages that facilitate design and analysis. Both are often used within robotics educational curriculum. For that reason, we decided to make Bobble-Bot Matlab compatible by creating an example Matlab interface and demonstration project.
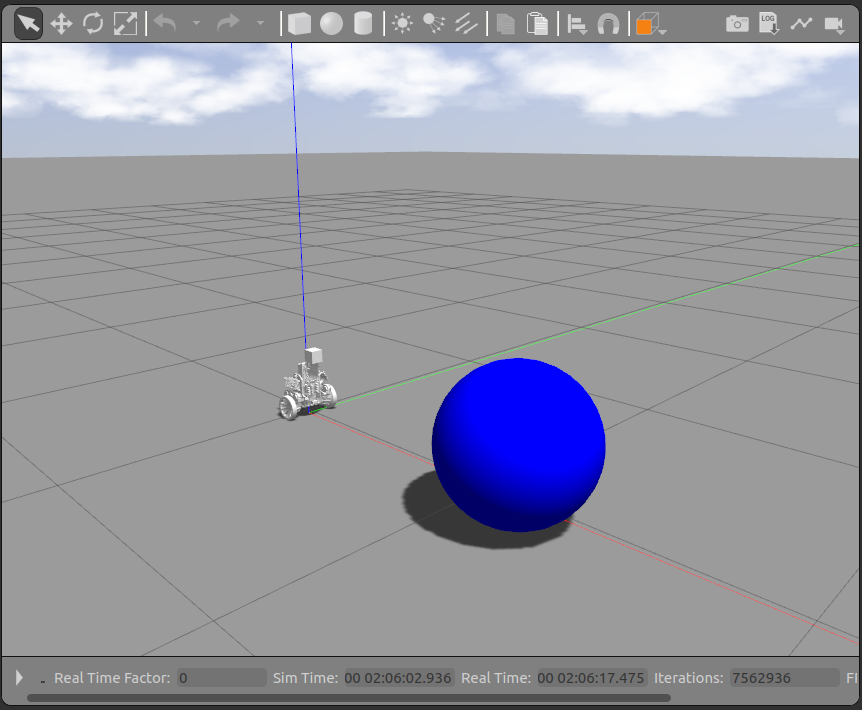
See the graphic below to understand where we're headed. By the end of this post, you'll be able to teach Bobble-Bot to seek for and follow a blue ball using Matlab in combination with techniques from image processing. The source code for the demonstration project can be found here. This simple example shows how to use Matlab to work with Bobble-Bot. Keep in mind, this is just a jumping off point. Once you have Matlab talking to Bobble-Bot, a whole world of possibilities opens up. You have the full power of the Matlab engine at your disposal! Enough hype... let's just get started and see how this actually works.
Get the Software You'll Need
This example is adaptable for both simulation and real hardware. This post will focus on simulation in order to make it easier for others to follow along. That said, the first step is to make sure you have the Bobble-Bot simulator. Go grab it for free from GitHub. Follow the instructions on the README to get going. More detail can also be found in this blog post.
Next up you'll need Matlab and the Image Processing and Robotics System Toolboxes. If you're a student, check with your university to see if you can get a copy of Matlab and these toolboxes for free. If you're in industry, be prepared to shell out some dough if you do not already have these available to you. Such is the way of the Matlab.
Finally, clone this additional repository in order to get the custom Bobble-Bot ROS message interface for Matlab along with the ball following example.
git clone https://github.com/super-owesome/bobble_matlab.git
Add Camera Sensor to Bobble-Bot URDF
Now we'll need to modify the URDF in bobble_description to add a camera sensor and plugin to the Gazebo simulation. This will enable Matlab to see the environment via a ROS camera message topic. To do this, just un-comment the following line in bobble.urdf.xacro so that section looks like so:
<xacro:include filename="$(find bobble_description)/xacro/bobble_chassis.urdf.xacro" />
  <xacro:include filename="$(find bobble_description)/xacro/camera.urdf.xacro" />
  <xacro:include filename="$(find bobble_description)/xacro/bno055_imu.urdf.xacro" />
Be sure to re-build the simulation after making this change using catkin build.
Load the Bobble-Bot ROS Messages into Matlab
Let's make sure we can use Matlab to communicate with the Bobble-Bot sim. Start by launching the sim with the following command:
roslaunch bobble_controllers run_sim.launch
Next, launch Matlab and navigate to your bobble_matlab folder. Call the LoadBobbleMessages function to load the custom Bobble-Bot ROS messages into your path. This is a one time operation. From there, you can initialize the Bobble-Bot simulation connection and test sending some commands like so:
>> LoadBobbleMessages();
>> handles = InitBobbleSimConnection()
>> ActivateBobbleBot(handles.cmdBbPub);
>> velMsg = rosmessage(handles.velPub);
>> velMsg.Linear.X = 0.25; send(handles.velPub, velMsg);
>> velMsg.Linear.X = -0.25; send(handles.velPub, velMsg);
>> velMsg.Linear.X = 0.0; send(handles.velPub, velMsg);
>> ResetBobbleBot(handles.cmdBbPub);
>> ActivateBobbleBot(handles.cmdBbPub);
>> velMsg.Angular.Z = 0.1; send(handles.velPub, velMsg);
>> velMsg.Angular.Z = -0.1; send(handles.velPub, velMsg);
>> velMsg.Angular.Z = 0.0; send(handles.velPub, velMsg);
>> ResetBobbleBot(handles.cmdBbPub);
>> rosshutdown()
For convenience, the above commands are also provided in script form so they can be run with a single command like so:
run TestBobbleConnection.m
If everything is working correctly, the commands above should result in something like the following behavior:
There is no sense in continuing on unless you have the above test working. File an issue here if you are having trouble and I will try to help.
Add Blue Ball to Gazebo Scene
Using the Gazebo Model Editor, create a spherical blue ball. To do this click Edit -> Model Editor (CTRL+M). From there use the Simple Shapes option to drag a sphere onto your scene. Edit the sphere's settings to make it blue and get the size that you want. When done click File -> Exit Model Editor (CTRL+X). Be sure to save your blue ball model upon exiting.
Test Object Detection
Once you have the blue ball within Bobble-Bot's field of view, visualized by the ugly square box at the top of Bobble-Bot, you're ready to switch back over to Matlab to test the object detection algorithm. Enter the commands below:
>> handles = InitBobbleSimConnection()
>> blueBallParams.blueMax = 120;  % Maximum permissible deviation from pure blue
>> blueBallParams.darkMin = 30;   % Minimum acceptable darkness value
>> latestImg = readImage(handles.colorImgSub.LatestMessage);
>> [c,~,ball] = FindBlueBall(latestImg,blueBallParams);
>> PlotBlueBallLocation(latestImg, ball, c);
You can repeat the above steps to tune the blueMax and darkMin values and observe their impact on blue ball detection under various simulated lighting conditions. If everything works, you should get something like this:

Tune PID Control Loop
With proper blue ball detection now working, we're ready for the last step: tuning the ball following PID controller. The default values I provide will work fine, but you'll want to experiment with different values to observe their effect. The gains are defined in Follow.m. To run the entire control loop, use the following command:
run Follow.m
If everything works, you should now be able to manipulate the blue ball's location in sim and watch as Bobble-Bot tries to find the ball and then drive to it. Here's an example of what to expect:
Conclusion
That about does it for this post. Hopefully the provided code gives you a jumping off point for trying your own high level Bobble-Bot controllers using Matlab. Thanks for reading!
References
This post would not be possible without the excellent support provided by MathWorks. This Bobble-Bot example relies heavily on the Track and Follow an Object Example created by MathWorks for TurtleBot. That example is provided as part of the Robotics System Toolbox. Here are some references that were most useful to me while putting this post together.